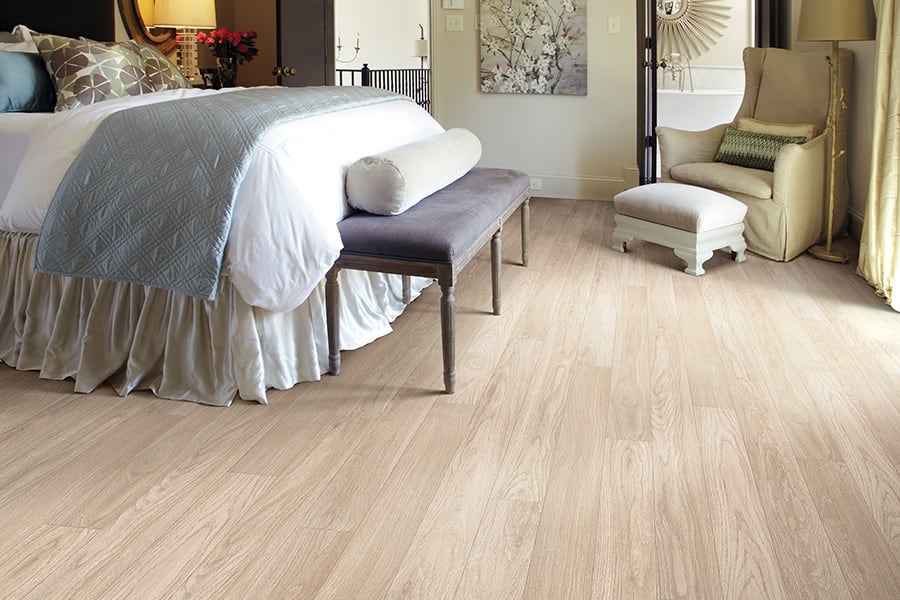
There are styles that convey the authentic look of wood or the classic appeal of ceramic tile.
Various shades and finishes allow you to choose the wood look down to the species, and now laminates are mimicking hardwood even more. Some laminates offer beveled, distressed, and highly textured options—giving your laminate floor not only the look of hardwood, but the feel of it, too.
Laminates are inherently “green,” because they use fewer resources and far less wood in their manufacture. And because they’re durable—some styles even offer 25-year warranties—you don’t have to replace laminate floors as often.
Laminates are inherently “green,” because they use fewer resources and far less wood in their manufacture. And because they’re durable—some styles even offer 25-year warranties—you don’t have to replace laminate floors as often.
Care & maintenance of laminate
Laminate’s construction makes it inherently durable, but you’ll want to remember a few basics of routine care, protection, and repair. Depend on us to let you know all about these methods for keeping your laminate floor at its most attractive.
Request an estimate
Please be sure to reference your laminate floor warranty for specific care requirements! For your general information, however, here are some basic tips and facts:
- Use a damp cloth to blot up spills as soon as they happen. Never allow liquids to stand on your floor.
- For tough spots, such as oil, paint, markers, lipstick, ink, or tar, use acetone/nail polish remover on a clean white cloth, then wipe the area with a damp cloth to remove any remaining residue.
- Sweep, dust, or vacuum the floor regularly with the hard floor attachment (not the beater bar) to prevent accumulation of dirt and grit that can scratch or dull the floor finish.
- Periodically clean the floor with cleaning products made specifically for laminate floor care.
- Do not wash or wet mop the floor with soap, water, oil-soap detergent, or any other liquid cleaning material. This could cause swelling, warping, delamination, and joint-line separation, and void the warranty.
- Do not use steel wool, abrasive cleaners, or strong ammoniated or chlorinated type cleaners.
- Do not use any type of buffing or polishing machine.
For spots such as candle wax or chewing gum, harden the spot with ice and then gently scrape with a plastic scraper, such as a credit card. Be careful not to scratch the flooring surface. Wipe clean with a damp cloth.
Installation of laminate
We help you every step of the way after you’ve selected your new floor: professional on-site measurement, removal of old flooring, and skilled installation. We do it all expertly, so your floor will look amazing and give lasting satisfaction. Learn the particulars about laminate installation here.
Before installation
You want a problem-free installation and, to help ensure it, here’s a checklist of things to do before the installer arrives:
Before installation
You want a problem-free installation and, to help ensure it, here’s a checklist of things to do before the installer arrives:
- Make sure you know who’s removing your existing flooring. If you wish, the installer will do it. If not, you should make arrangements to have it removed.
- Who’s moving the furniture? Decide in advance if you want to take on the responsibility or if you want the installer to handle it. Either way, be sure to remove all fragile items from the room.
In general, your laminate should run parallel to windows or, in narrow rooms, to the longest wall. - Measure door clearances before you have your laminate installed. If the new floor is thicker than your existing floor, door bottoms may rub. Plan in advance to have someone shave or saw the correct amount off the bottom of each door so it does not drag.
- Paint first. If you’re planning to paint, wallpaper, or do any other remodeling in the room, it’s best to do it before your laminate is installed. Keep extra paint to touch up any post-installation nicks.

During installation
Proper installation is critical to make your hardwood flooring look good now and for a long time to come. Here’s the procedure an experienced installation professional will follow:
- Current flooring: Laminate can be installed directly over some existing floors, but others will have to be removed first. Your professional installer will know the proper procedure, as well as how to make the floor level and smooth.
- Moisture testing: Your installer will check for moisture in the subfloor to prevent later problems with buckling or cupping.
- Installation: Using the appropriate tools, the installer will cut and place the planks or tiles, maintaining a gap around the floor’s perimeter to allow for expansion.
- Room shape: A professional will know how to handle any challenges caused by room irregularities and odd or tight spaces, like cabinetry or a kitchen island.


